
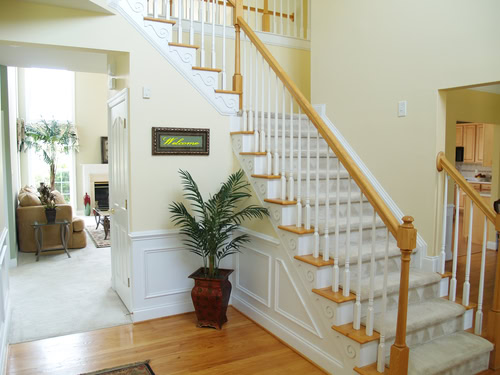
Stained wood trim, a refinished railing, or rich interior doors can warm up a whole room — but interior staining is far less forgiving than painting, where every drip and lap mark shows. This guide covers how to stain interior wood trim, railings, and doors for an even, professional finish, and how Winnipeg’s dry indoor winters affect the work. Here’s what you’ll learn: prep, stain types, application steps, and when to call a pro.
Interior wood staining in Winnipeg means preparing bare or stripped wood, applying a penetrating or gel stain evenly, and sealing it with a clear protective topcoat for trim, railings, doors, and built-ins. The result depends almost entirely on prep and even application — stain highlights every scratch and sanding mark, so the surface work matters more than the colour you choose.
What is interior wood staining, and how is it different from painting?
Interior wood staining is the process of colouring wood with a penetrating finish that soaks into the grain rather than covering it, then protecting it with a clear topcoat. Unlike paint, which sits on top and hides the wood, stain enhances the natural grain and leaves it visible. That’s why prep is unforgiving: paint conceals minor flaws, stain reveals them.
Staining suits:
- Interior trim, baseboards, and casings
- Stair railings, spindles, and newel posts
- Interior doors and built-in cabinetry
- Window sills and feature wood
Which interior wood stain should you use?
The best stain depends on the wood and the look you want: oil-based penetrating stains give deep, even colour, water-based stains dry fast and stay low-odour, and gel stains sit on the surface to tame blotchy woods. For tricky species like pine and maple — common in Winnipeg homes — gel stain is often the most reliable choice.
| Stain Type | Best For | Notes |
|---|---|---|
| Oil-based penetrating | Open-grain woods (oak, ash) | Rich colour, longer dry time, more odour |
| Water-based | Low-odour interior work | Fast dry, raises grain slightly |
| Gel stain | Blotch-prone woods (pine, maple), railings | Sits on surface, very even, good for vertical |
| Combination stain-and-seal | Quick refreshes | Convenient, less control over depth |
How do you stain interior trim and railings step by step?
Staining interior wood takes six steps, and skipping the conditioner on softwoods is the usual cause of blotchy results. Work in a well-ventilated space and keep a wet edge to avoid lap marks.
- Sand progressively. Work up through the grits (e.g., 120 then 180–220) and remove all old finish. Smooth, uniform sanding equals uniform colour.
- Clean off dust. Vacuum and wipe with a tack cloth — leftover dust shows in the finish.
- Apply wood conditioner. On pine, maple, and birch, a pre-stain conditioner evens out absorption and prevents blotching.
- Apply stain evenly. Brush or wipe with the grain, then wipe off the excess within the product’s window. Longer dwell means deeper colour.
- Let it dry fully. Winnipeg’s dry winter indoor air speeds drying, but don’t rush the topcoat — follow the recoat time.
- Seal with a clear topcoat. Two or three thin coats of polyurethane protect railings and trim from wear, with a light sand between coats.
Does Winnipeg’s dry winter air affect interior staining?
Yes — Manitoba’s very dry indoor winter air makes stain and topcoat flash off faster, which shortens your working time and can cause lap marks if you move too slowly. Plan smaller sections, keep a wet edge, and don’t overload the brush. The upside is faster recoat times; the trade-off is less margin for error, so vertical work like railings benefits from a slower-setting gel stain.
Which is right for you — DIY or a pro finish?
If you’re refreshing a short run of baseboard or a single door and you enjoy detail work, staining is a rewarding DIY project with the right prep. If you’re tackling a full staircase, blotch-prone wood, or want a flawless, durable finish on high-touch railings, a professional finish is worth it — even colour on spindles and handrails is genuinely hard to achieve by hand. Our wood staining team in Winnipeg handles interior trim, railings, and doors with the prep and topcoat steps that make the finish last.
If your project is exterior rather than interior, the approach differs — see our guide on cedar staining and whether to strip or re-stain. For background on how stains interact with grain, the wood stain overview on Wikipedia is a helpful primer.
Bring out the beauty of your wood
Want rich, even stained trim and railings without the trial and error? Request a free estimate from Lakeside Painters. We proudly serve Winnipeg, MB and the surrounding Manitoba communities — including homeowners in Niverville, Selkirk, Steinbach, and Stonewall, plus the wider Interlake and cottage country. Call (204) 791-8352 or visit our contact page for a no-pressure quote on interior wood staining.
Frequently Asked Questions
How much does interior wood staining cost in Winnipeg?
Interior wood staining costs in Winnipeg depend on the amount of trim or railing, the wood species, how much old finish must be stripped, and the number of topcoats. Detailed work like spindles and built-ins takes more labour than straight baseboard runs. Ask for an itemized estimate that separates prep, stain, and sealing.
Can you stain over existing stained or varnished wood?
You can refresh wood with a gel stain that sits on the surface, but for a true colour change you usually need to strip or sand back to bare wood first. Old varnish blocks penetrating stain from soaking in, leading to uneven results. Testing a hidden area first tells you which approach the piece needs.
Why does my stain look blotchy on pine?
Pine and other softwoods absorb stain unevenly because of their varying grain density, which causes blotching. A pre-stain wood conditioner evens out absorption so the colour lands uniformly. Gel stains also help because they sit on the surface rather than soaking in unpredictably.
How long should stain dry before applying a topcoat?
Drying time depends on the stain type and conditions, but Winnipeg’s dry indoor winter air often speeds it up. Always follow the manufacturer’s recoat window rather than guessing — sealing too soon can trap solvents and cloud the finish. When in doubt, give it extra time before the clear coat.
Is staining or painting better for interior trim and railings?
Neither is universally better — it depends on the look you want. Staining showcases natural wood grain and suits warm, traditional interiors, while paint gives a uniform, modern finish and hides flaws. For high-touch railings, both need a durable protective topcoat to handle daily wear.

Tyler is a highly motivated and hardworking individual with an entrepreneurial mindset and a genuine passion for people. He is currently pursuing a Bachelor of Commerce (Honours) degree, majoring in Marketing and Small Business/Entrepreneurship.
As the owner of Lakeside Painters, a Winnipeg-based painting company serving Winnipeg and surrounding cottage country regions, Tyler has gained hands-on experience in business ownership, customer service, sales, and project management. Lakeside Painters specializes in high-quality residential and commercial painting services, including interior painting, exterior painting, wood staining, and stucco coating, with a strong focus on professionalism, attention to detail, and customer satisfaction.
With an energetic and optimistic attitude, Tyler thrives in team environments and is willing to take on challenges in fast-paced, high-pressure settings. He brings strong problem-solving abilities, excellent communication skills, and a natural ability to connect with and understand others—skills he has developed through previous sales roles and his experience building Lakeside Painters.