Why a “dry” primer can still cause paint problems
If you’ve ever touched a primed wall and thought, “Feels dry—let’s paint,” then ended up with peeling, drag marks, or a sticky mess… you’re not alone.
The main confusion is that “dry” can mean different things:
- Dry to the touch: the surface doesn’t feel wet anymore
- Ready to recoat: You can apply the next layer (paint or another primer coat) safely
- Fully cured: the primer has hardened as much as it’s going to, and it can handle stress, cleaning, and normal wear better
When people search for “how long does it take for primer to dry,” they usually need a practical timeline to avoid mistakes. This guide breaks it down into simple ranges, real-life factors that slow drying, and easy checks you can do before you start painting.
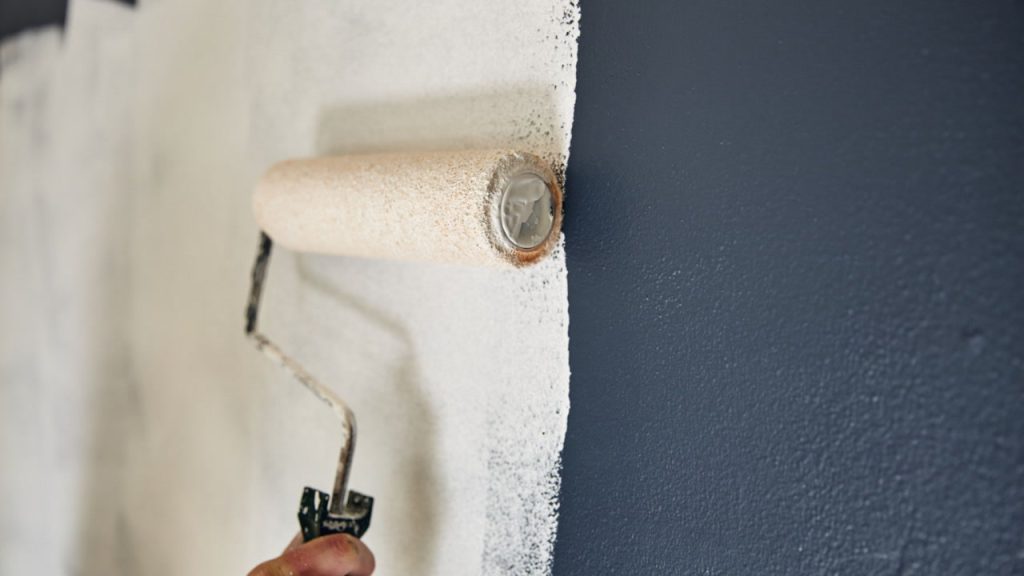
Typical primer dry times (quick timeline)
Primer dry time depends on the product, but these ranges are a realistic starting point for most homes.
Water-based (latex/acrylic) primer
- Dry to the touch: about 30–60 minutes
- Ready to recoat: about 1–3 hours
- Heavier coats / high humidity: 3–6+ hours
Oil-based primer
- Dry to the touch: about 6–8 hours
- Ready to recoat: about 12–24 hours
Shellac-based primer (often for stains/odours)
- Dry to the touch: about 15–45 minutes
- Ready to recoat: about 1–2 hours
Important: these are general ranges. Always check the label on your can, because “recoat time” can vary widely by brand and formulation.
Dry time vs recoat time vs cure time (the part most people skip)
Here’s the simplest way to think about it:
Dry to the touch
This is the earliest stage. The primer feels dry on the surface, but it may still be soft underneath.
This is not always the same as “ready to paint.”
Ready to recoat
This is what you’re usually looking for.
If you paint too early, you can trap moisture or solvents under the top coat. That can lead to:
- poor adhesion (paint scratches off easily)
- bubbling or “wrinkling”
- roller drag and uneven texture
- a tacky surface that never seems to harden properly
Fully cured
Cure time matters most for cabinets, trim, doors, and high-contact surfaces.
Primer doesn’t always need to be “fully cured” before painting, but it does need to be ready to recoat. Cure time can range from several days to several weeks, depending on the product type and conditions.
The 6 biggest factors that change how long primer takes to dry
If your primer is taking longer than expected, it’s usually one (or more) of these.
1) Temperature (especially in colder seasons)
Most primers dry best around 18–24°C (65–75°F).
If your room is cooler, drying slows down. If it’s very cold, primer can stay tacky for a long time, and adhesion can suffer.
In Winnipeg winters, a chilly room near exterior walls can easily slow drying even if your furnace is running.
2) Humidity
Humidity is a major reason people ask, “How long does it take for primer to dry,” and get frustrated.
Higher humidity means moisture lingers in the coating longer, especially for water-based primers. If your home has:
- lots of cooking steam
- a humidifier running
- poor airflow
…expect longer dry times.
3) Airflow and ventilation
Primer dries faster when air can move across the surface.
A closed room with still air dries slower than a room with:
- a fan circulating air (not blasting directly at one spot)
- normal HVAC airflow
- a slightly open doorway for circulation
4) How thick did you apply it
A heavy coat might feel dry on the top but remain soft underneath.
Thick primer coats can also create:
- lap marks
- drips
- uneven texture that shows through paint
Two thinner coats often beat one thick coat for both dry time and final finish.
5) The surface you’re priming
Different materials “drink” primer differently.
- New drywall can absorb primer quickly, but joint compound areas may dry unevenly
- Bare wood can slow drying if it’s resinous or if the primer sits on the surface
- Previously painted glossy surfaces can cause adhesion issues if not sanded/deglossed
- Stained or water-damaged spots can bleed through and may need a specialty primer
6) Tinting and stain-blocking needs
Some primers designed for tough stains or odours dry differently from standard primers.
If you’re using a stain-blocking primer, follow the label carefully. Rushing the recoat step is one of the easiest ways to create problems later.
Room-by-room primer timelines (what most homeowners really want)
Here are realistic “plan your day” guidelines that work for most home projects.
Living rooms and bedrooms (standard walls)
If you’re using a water-based primer on walls:
- prime in the morning
- paint by early afternoon in normal conditions
- wait longer if the room is cool or humid
Kitchens and bathrooms (higher moisture and oils)
These rooms often need:
- better cleaning and prep before priming
- slightly longer drying windows due to humidity and residue
If you’re priming in a kitchen or bath, consider giving it a bit more time. It’s often the difference between paint that holds up and paint that chips early.
Trim and doors (high-touch surfaces)
Trim and doors get handled more, so you want good adhesion.
- water-based primer can be ready to recoat in a few hours
- oil-based primer often needs overnight or longer
- allow extra time before reinstalling hardware or closing doors tightly
Cabinets (where patience pays off)
Cabinet projects are where rushing causes the most regret.
Primer may be “dry,” but cabinet doors can still be soft. If you stack or flip doors too early, you can:
- imprint the surface
- stick doors together
- leave permanent marks
Give the cabinet primer extra time, especially with thicker coats or cool conditions.
How to tell if primer is actually ready (easy at-home checks)
You don’t need fancy tools. Try these.
The light-touch test
Lightly touch a hidden area:
- if it feels cool or slightly tacky, wait
- if it feels dry and normal-temperature, move to the next test
The fingernail test (gentle)
In an inconspicuous spot, press a fingernail lightly:
- if it leaves a dent, it’s not ready
- if it stays firm, you’re closer
The tape test (for adhesion readiness)
This is especially helpful if you primed over a previously glossy or questionable surface.
- apply a small piece of painter’s tape
- press it down
- pull it off sharply
If primer lifts, you need more prep (often cleaning and sanding) before continuing.
What happens if you paint over primer too soon?
Painting too soon can cause issues that show up immediately—or weeks later.
Common short-term problems
- roller dragging and rough texture
- visible streaking or patchiness
- paint not leveling well
- “gummy” feeling under the roller
Common long-term problems
- peeling when you clean the wall
- chipping around switches and doors
- bubbling or blistering in humid areas
- poor durability on trim and cabinets
If your goal is a finish that lasts, waiting a few extra hours is usually worth it.
Why primer stays sticky (and how to fix it)
Sticky primer is one of the most common homeowner headaches.
Causes of sticky primer
- room is too cold
- humidity is too high
- primer coat applied too thick
- poor airflow
- wrong primer for the surface (especially over glossy finishes)
- greasy residue still on the surface (common in kitchens)
What to do
- raise the room temperature if possible
- run a fan to circulate air
- reduce humidity (bath fan, kitchen fan, or dehumidifier)
- give it more time—don’t rush paint on top of tacky primer
- if the surface is oily (like kitchen walls), cleaning may need to be redone before repainting
If you’re seeing persistent tackiness after a long wait, it may be a sign that the surface prep wasn’t adequate or that the product isn’t compatible with what’s underneath.
How to speed up primer drying safely
If you’re on a tight schedule, there are safe ways to help primer dry faster without risking the finish.
Boost airflow (without blasting one spot)
- run a fan to circulate air around the room
- keep doors open for better circulation
- avoid aiming a strong fan directly at wet primer (can cause uneven drying)
Control humidity
- use bathroom/kitchen exhaust fans
- run a dehumidifier
- avoid adding moisture (like boiling pots) during drying
Keep the temperature steady
A consistent warm temperature helps more than quick bursts of heat.
If you crank the heat and then let the room cool down, you can slow overall drying and create uneven conditions.
Apply thinner coats
This is the fastest “hack” that also improves results.
A thinner, even coat dries more predictably and reduces lap marks.
Primer type: choosing the right one affects drying time and results
If you’re priming and wondering why it’s taking “forever,” primer choice may be part of it.
Water-based primer
Best for:
- most interior walls
- drywall
- general prep before repainting
Typical benefit:
- faster dry time
- lower odour
Oil-based primer
Best for:
- blocking tough stains (depending on product)
- sealing certain woods
- situations where adhesion needs a boost
Trade-off:
- slower drying
- stronger odour
- longer recoat window
Shellac-based primer
Best for:
- stubborn stains
- smoke damage
- odour blocking
Trade-off:
- strong odour
- faster drying, but needs careful handling and ventilation
If you’re painting in Winnipeg and want a primer approach that matches local conditions and typical home surfaces, this Lakeside Painters resource can help you think through primer selection and prep.
Realistic “day plan” examples for common projects
Sometimes, the best answer to “how long does it take for primer to dry” is an actual schedule.
Example 1: Priming a bedroom wall (water-based primer)
- 9:00 AM: prime walls
- 10:00–11:30 AM: primer becomes dry to the touch
- 12:00–2:00 PM: likely ready to paint (depending on humidity/temperature)
- afternoon: first coat of paint
- evening: second coat (if needed) after proper paint recoat time
Example 2: Priming kitchen walls after cleaning
- morning: clean and let the walls fully dry
- late morning: prime
- early afternoon: check dryness
- mid/late afternoon: paint if primer is firm and ready to recoat
- if humidity is higher: push painting to the evening or the next day
Example 3: Priming trim (oil-based)
- day 1: prime early
- day 1 evening: still drying
- day 2: paint after it’s clearly ready to recoat
Common primer questions that change the timeline
A few quick clarifications that save a lot of stress.
“It’s dry to the touch. Why does it still smell?”
Odour can linger even after the surface feels dry, especially with oil-based or shellac primers. Odour alone doesn’t always mean “not ready,” but it often signals that solvents are still evaporating. Follow the label-recoat time and perform the touch and firmness checks.
“Can I paint the same day, no matter what?”
Often, yes, with a water-based primer—if conditions are decent. But if it’s cool and humid, or if you applied a heavier coat, same-day painting can be risky.
“Do I always need primer?”
Not always. But primer is helpful when:
- you’re painting over repairs
- you’re changing from dark to light
- you have stains
- the surface is glossy or inconsistent
- you want stronger adhesion and a more even finish
If you’re planning a full refresh, Lakeside Painters’ interior painting page is a good reference point for how prep and coating choices fit together: https://lakesidepainters.ca/interior-painting/
FAQs
1) How long does it take for primer to dry before painting?
For many water-based primers, it can be ready to paint in 1–3 hours, but cooler temperatures, humidity, or thick coats can push it to 3–6+ hours. Oil-based primers often need 12–24 hours before painting.
2) Can I paint over primer if it’s dry to the touch?
Not always. “Dry to touch” precedes “ready to recoat.” If the primer is still soft or tacky underneath, paint may not bond well and can peel later.
3) How can I make primer dry faster?
Improve airflow, reduce humidity, and keep the room at a steady warm temperature. Also, apply thinner coats so the primer dries evenly and predictably.
4) Why is my primer still sticky after hours?
Common reasons include high humidity, a cool room, thick application, poor airflow, or greasy residue on the surface (especially in kitchens). Give it more time and improve ventilation and humidity control.
5) What’s the difference between primer dry time and cure time?
Dry time is when the surface stops feeling wet. Recoat time is when you can safely paint over it. Cure time is the time it takes to fully harden, which can take days depending on the primer type and conditions.