Painting a stucco ceiling can feel intimidating for one reason: texture. Those peaks and valleys look great when they’re consistent, but they also make it easy to miss spots, overload paint, or end up with drips you only notice after everything dries.
The good news is that you can absolutely get a clean, even finish on stucco ceilings if you approach it like a system: the right tools, the right prep, the right paint, and a method that keeps coverage consistent from one section to the next.
This guide walks you through exactly how to paint stucco ceilings step by step, with practical tips to avoid the most common problems homeowners encounter.
Before you start: What does a “stucco ceiling” usually mean indoors
Indoors, people often call any textured ceiling “stucco,” but it can be a few different finishes:
- Knockdown texture (flattened blobs)
- Orange peel (fine, bumpy texture)
- Heavier troweled texture (larger ridges and patterns)
- Popcorn texture (chunky acoustic texture)
The painting method is similar for all of them, but popcorn ceilings pose an extra concern: if your home is older, the popcorn texture may contain asbestos. If you suspect that’s possible, it’s worth testing before sanding, scraping, or disturbing the surface.
The biggest mistakes people make when painting stucco ceilings
If you avoid these, you’re already ahead:
- Skipping dust removal (paint won’t bond well to powdery texture)
- Using the wrong roller nap (too short = missed valleys, too long = splatter)
- Loading too much paint (drips, sagging, uneven sheen)
- Painting in random directions (patchy coverage shows under lighting)
- Not controlling the room (humidity and airflow change dry time and finish)
A textured ceiling doesn’t forgive rushed work. A steady plan does.
Tools and materials you’ll actually need
You don’t need fancy gear, but you do need the right basics.
Core tools
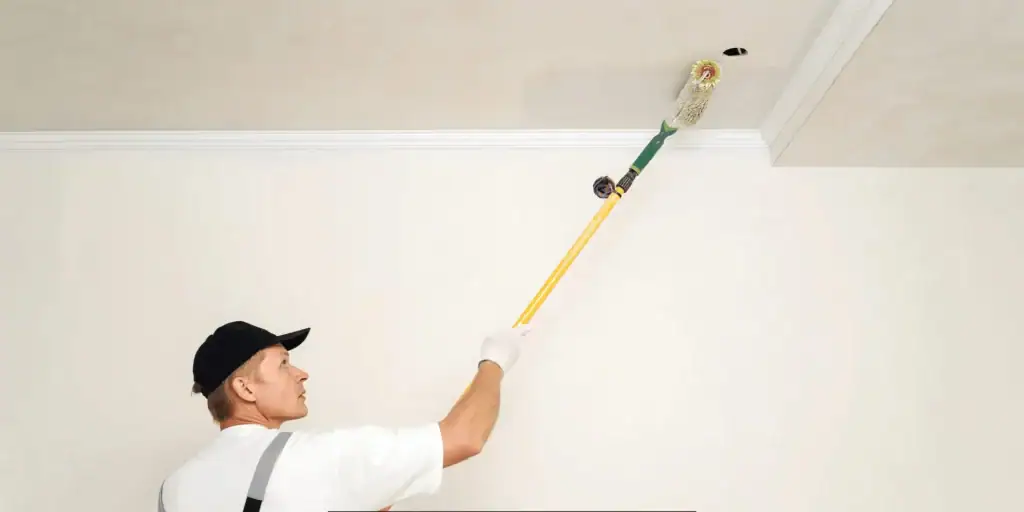
- Extension pole (your shoulders will thank you)
- Roller frame and roller covers
- Angled sash brush (for edges and tight spots)
- Paint tray + liner, or a bucket with roller grid (bucket + grid is easier for ceilings)
- Drop sheets (canvas is best) and plastic (for walls/cabinets)
- Painter’s tape (only where needed)
- Step ladder
- Work light (shows missed spots immediately)
Best roller nap for stucco ceilings
Roller nap is a big deal here:
- Light texture: 1/2″ nap
- Medium texture: 3/4″ nap
- Heavy texture: 1″ nap (sometimes 1-1/4″ if it’s very deep)
If you choose too short a nap, you’ll paint only the “high points” and miss the valleys. If you go too long, you may get more splatter and a rougher finish—still manageable, just messier.
Helpful add-ons
- Roller spatter guard (optional, but useful)
- Corner roller (nice to have, not required)
- Patch supplies (premixed compound for small repairs)
- Vacuum with brush attachment (for dust removal)
- Mild cleaner (if there’s kitchen grease or smoke residue)
Choosing the right paint for stucco ceilings
Most ceilings look best with flat or matte paint. It helps hide minor unevenness and reduces glare from lights.
Flat vs matte
- Flat hides texture variations well and reduces sheen patches.
- Matte is slightly more washable, but it can show sheen differences if you overwork an area.
For most stucco ceilings, flat ceiling paint is the easiest route.
When you need a specialty paint
Use a stain-blocking system if you have:
- Water stains
- Smoke staining
- Grease near kitchen areas
- Tannin bleed from wood contamination (rare on ceilings, but possible)
If you’re unsure whether you need specialty prep, it helps to follow a proven process, such as the one used for stucco coating work and finishes. Lakeside Painters’ stucco service overview is a helpful reference for how textured surfaces are treated for long-term results: https://lakesidepainters.ca/stucco-coating/
Do you need a primer on a stucco ceiling?
Sometimes yes, sometimes no.
Prime if:
- The ceiling is new or patched (bare compound)
- You’re painting over stains
- The surface is chalky or dusty even after cleaning
- You’re making a big color change
- The existing paint is uneven, or you see flashing (shiny dull patches)
You may skip primer if:
- The ceiling is already painted
- There are no stains or repairs
- The existing finish is solid and clean
- You’re repainting with a similar color
If you do prime, use a primer that matches the surface needs (general drywall primer for standard ceilings, stain-blocking primer for stains). Let primer dry fully before painting—texture can hide moisture, and painting too soon can create tacky spots that don’t level nicely.
Prep work that makes stucco ceiling painting go smoothly
This is where “pro results” come from.
1) Clear and protect the room
Stucco ceilings create splatter. Plan for it.
- Move furniture out or cluster it in the middle and cover it fully
- Cover floors with drop sheets
- Hang plastic on the walls if you’re protecting fresh wall paint
- Remove light fixtures if possible, or bag them neatly
2) Check for cracks, loose texture, and past water damage
Look closely under good lighting.
- Hairline cracks: fill and smooth carefully
- Loose texture: scrape what’s failing and patch
- Water stains: treat the cause first, then prime with stain-blocking primer
3) Clean the ceiling (yes, even ceilings get dirty)
Ceilings collect dust and, near kitchens, grease.
- Dust first using a vacuum brush attachment
- For greasy areas: wipe with a mild degreaser solution (lightly, don’t soak)
- Let it dry completely
If you paint over dust, the paint can grab unevenly and peel later in spots. Texture gives dust plenty of places to hide, so take your time here.
4) Patch and blend repairs
Keep repairs minimal and well-feathered.
- Patch small areas
- Sand lightly only where needed (be gentle—texture is easy to flatten)
- Prime patches so the finish looks consistent
5) Cut in edges before rolling
Cutting in around the perimeter helps keep the roller moving fast and evenly.
Use an angled brush and don’t overload it. On texture, heavy brushing can leave ridges, so keep it controlled.
The best way to paint stucco ceilings with a roller is
Rolling is the most common DIY approach, and it works well when you use a consistent pattern.
Step 1: Work in sections
Pick a manageable section size, like 4’ x 4’ or 4’ x 6’. Textured ceilings look patchy when you jump around the room.
Step 2: Load the roller properly
A roller should be loaded evenly, not dripping.
- Dip and roll on the grid (or tray ramp) until it’s saturated
- Roll off excess so it’s not pouring paint
On stucco texture, too much paint causes drips that dry into hard ridges.
Step 3: Use a steady “W” or “M” pattern, then fill in
Roll a “W,” then fill it in without lifting the roller too often. This spreads paint across peaks and valleys more evenly.
Step 4: Keep a wet edge
This matters a lot in ceilings with overhead lighting.
- Don’t let one section dry before you roll into the next
- Work steadily across the room
- Avoid stopping mid-section unless you must
A wet edge prevents lap marks and dull patches.
Step 5: Finish each section with light, single-direction passes
After coverage is built, make a few gentle passes in one direction to even out the texture. Don’t press hard—you’re smoothing the paint, not forcing it into the ceiling.
Step 6: Watch for drips as you go
Use your light at an angle. If you see a drip:
- Lightly roll it out immediately
- Don’t brush it unless you must (brushing often creates a raised mark)
Brush vs spray: Should you spray a stucco ceiling?
Spraying can be great on heavy textures because it gets into valleys easily, but it’s not always the best DIY choice.
Spraying is a good idea when:
- The texture is deep and rolling leaves, with holidays (missed spots)
- You’re painting a large, open ceiling
- You can mask the room well and control overspray
Spraying can be frustrating when:
- You can’t protect walls/floors well
- The room is full of furniture that you can’t move
- You’re not comfortable dialing in spray settings
If you spray, many people still back-roll lightly to ensure consistent coverage and bonding on rough surfaces.
How many coats should you apply?
Most stucco ceilings need two coats for a clean, even look—especially if:
- The ceiling is porous
- You’re changing color
- You have patchwork areas
- The existing paint is uneven
If you apply only one coat, you may see patchy areas when the room lighting hits the texture at night.
Dry time and room conditions
Texture can hold moisture longer, so dry time isn’t always as fast as it looks.
A few tips to keep the finish consistent:
- Keep the room at a stable temperature
- Use gentle airflow (a fan circulating air is fine)
- Avoid blasting heat directly at wet paint (can cause uneven drying)
- Don’t crank the humidity (avoid heavy cooking or steaming while it dries)
If you’re doing a second coat, follow the paint’s recoat window. Rushing can cause roller drag and uneven sheen.
Pro-level tips for an even, clean result
These small details make a big difference.
Use good lighting during the job
Don’t rely on ceiling fixtures alone. A portable light aimed at a low angle reveals:
- missed valleys
- thin spots
- drips you’d miss otherwise
Don’t overwork drying paint
Texture tricks you into “fixing” the same spot repeatedly. That can create sheen patches and roller marks. If an area is drying, let it be and catch it on the next coat.
Feather into cut-in areas
Where your brushed edges meet rolled sections, blend gently with the roller while the cut-in is still fresh. This avoids a visible border.
Mind the roller nap lint
New roller covers can shed. If you’ve had lint issues before, wash and spin-dry the roller cover first, or choose a high-quality cover that sheds less.
Keep your paint mixed
If you’re taking breaks, stir the paint again before continuing. Consistent paint = consistent sheen.
Special situations: stained ceilings, smoke, or kitchen grease
These are common in real homes, and they require a slightly different approach.
Water stains
- Fix the source
- Prime with a stain-blocking primer
- Paint two coats
Smoke residue
- Clean well
- Prime (smoke can bleed through standard paint)
- Paint as normal
Grease near kitchens
- Degrease thoroughly
- Rinse lightly (don’t soak texture)
- Prime if needed
- Paint
Skipping cleaning here is one of the biggest reasons ceiling paint fails early.
What if your stucco ceiling starts flaking during prep?
Stop and switch to “stabilize” mode.
- Scrape only what’s loose
- Patch and blend carefully
- Prime the repaired areas (or the whole ceiling if needed)
- Paint after the surface is stable
Painting over flaking texture usually leads to peeling later.
A simple step-by-step checklist
If you want the whole process in one place:
- Clear the room and cover everything
- Inspect the ceiling for cracks, stains, and loose texture
- Dust/vacuum the ceiling thoroughly
- Degrease if needed and let dry fully
- Patch small issues and prime repairs
- Cut in edges
- Roll the first coat in sections, keep a wet edge
- Let dry per label
- Roll the second coat for uniform coverage
- Remove tape carefully and clean up after it is fully dry
FAQs
1) What’s the best roller nap for stucco ceilings?
It depends on the texture depth. Use 1/2″ for light texture, 3/4″ for medium, and 1″ for heavier texture. The goal is to reach valleys without drowning the surface.
2) Do I need to prime before painting a stucco ceiling?
Prime if the ceiling is new, patched, stained, chalky, or uneven. If it’s already painted and in good condition, primer may not be necessary.
3) How do I avoid drips when painting stucco ceilings?
Don’t overload the roller. Roll off excess paint on a grid, work in sections, and check your work under an angled light so you can immediately roll out drips.
4) Is it better to spray or roll a stucco ceiling?
Rolling works well for most homes and is easier to control. Spraying can help with very deep texture, but requires heavy masking and comfort with overspray and equipment.
5) How many coats do stucco ceilings need?
Most stucco ceilings look best with two coats for even coverage, especially when changing colors or painting over repairs.
If you want, share whether your ceiling texture is light, medium, or heavy (or what it looks like), and I’ll tailor the roller nap, paint choice, and exact technique to your specific ceiling type—while still optimizing for painting stucco ceilings.

Tyler is a highly motivated and hardworking individual with an entrepreneurial mindset and a genuine passion for people. He is currently pursuing a Bachelor of Commerce (Honours) degree, majoring in Marketing and Small Business/Entrepreneurship.
As the owner of Lakeside Painters, a Winnipeg-based painting company serving Winnipeg and surrounding cottage country regions, Tyler has gained hands-on experience in business ownership, customer service, sales, and project management. Lakeside Painters specializes in high-quality residential and commercial painting services, including interior painting, exterior painting, wood staining, and stucco coating, with a strong focus on professionalism, attention to detail, and customer satisfaction.
With an energetic and optimistic attitude, Tyler thrives in team environments and is willing to take on challenges in fast-paced, high-pressure settings. He brings strong problem-solving abilities, excellent communication skills, and a natural ability to connect with and understand others—skills he has developed through previous sales roles and his experience building Lakeside Painters.